官网地址:Code Editing
官网地址:MinGW64
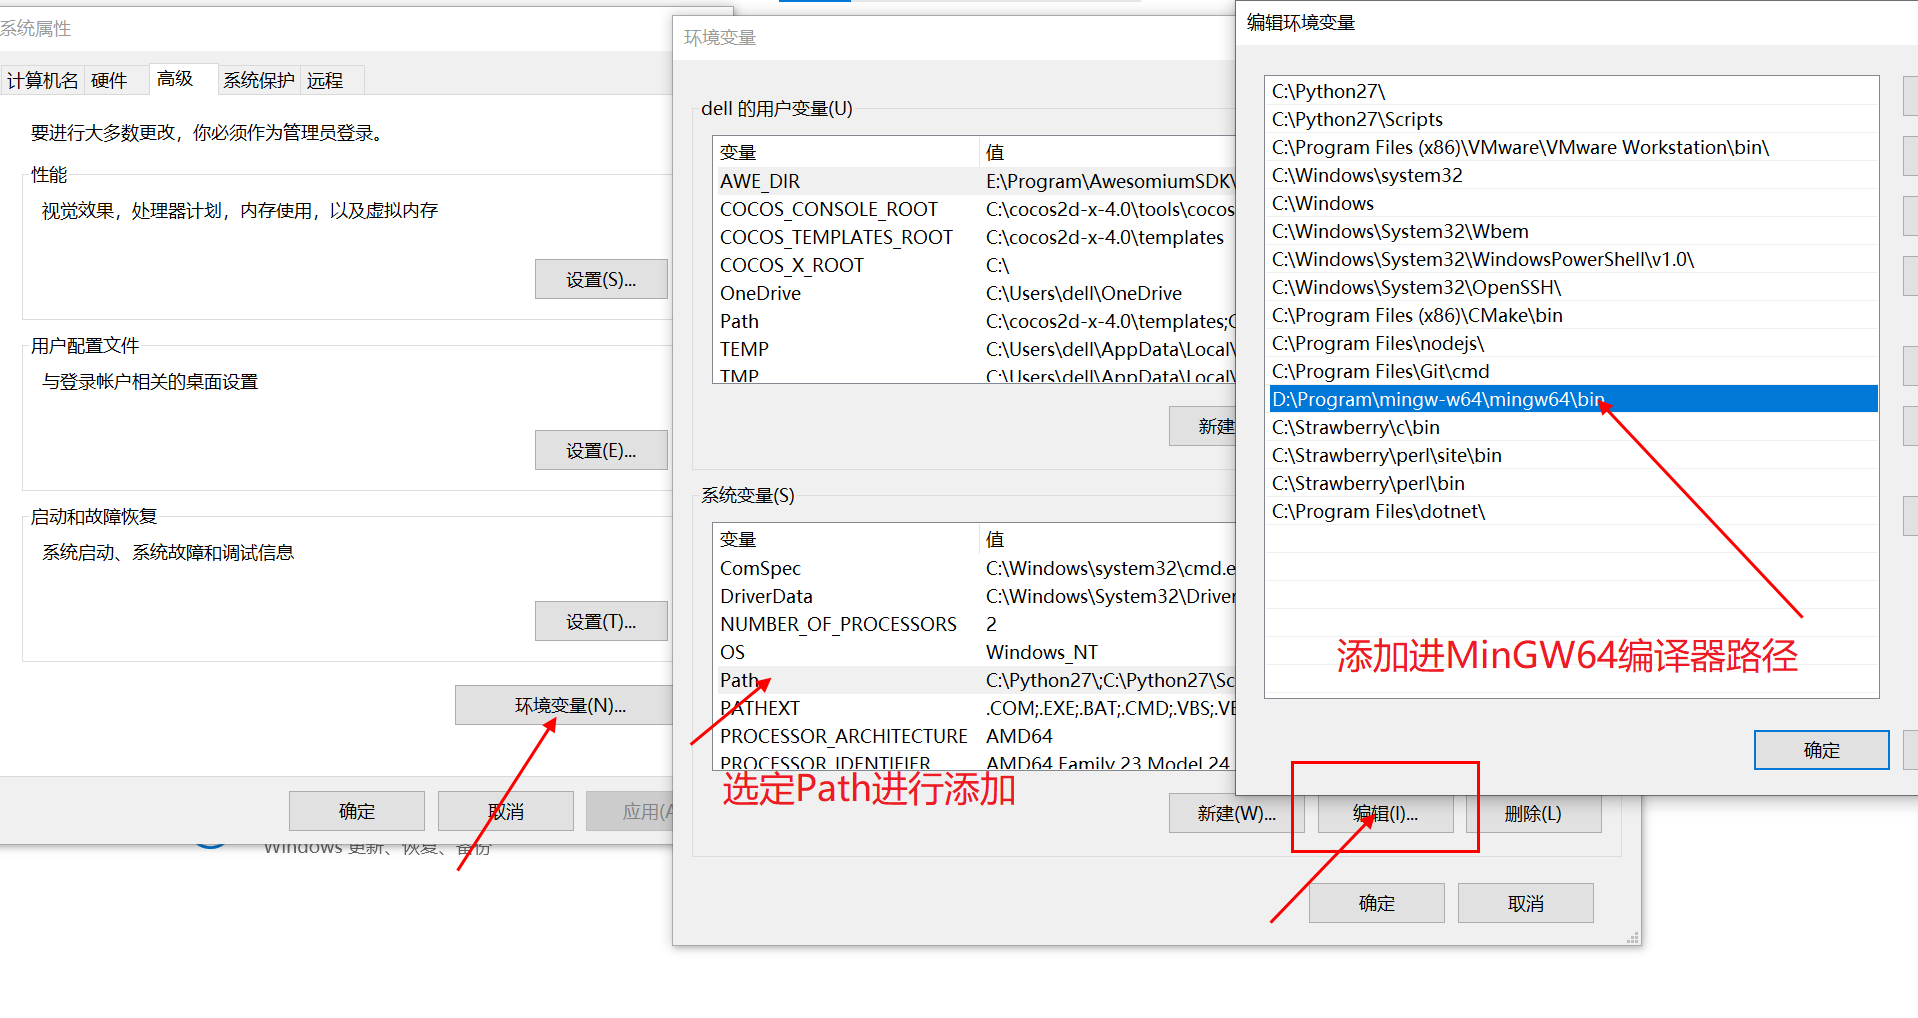
Win+I 打开系统设置编辑系统环境变量 高级 > 环境变量 > 选定 Path 进行编辑 路径
进入 VsCode 找到左侧栏的 Extensions
C/C++
Chinese (Simplified)(简体中文)
Code Runner
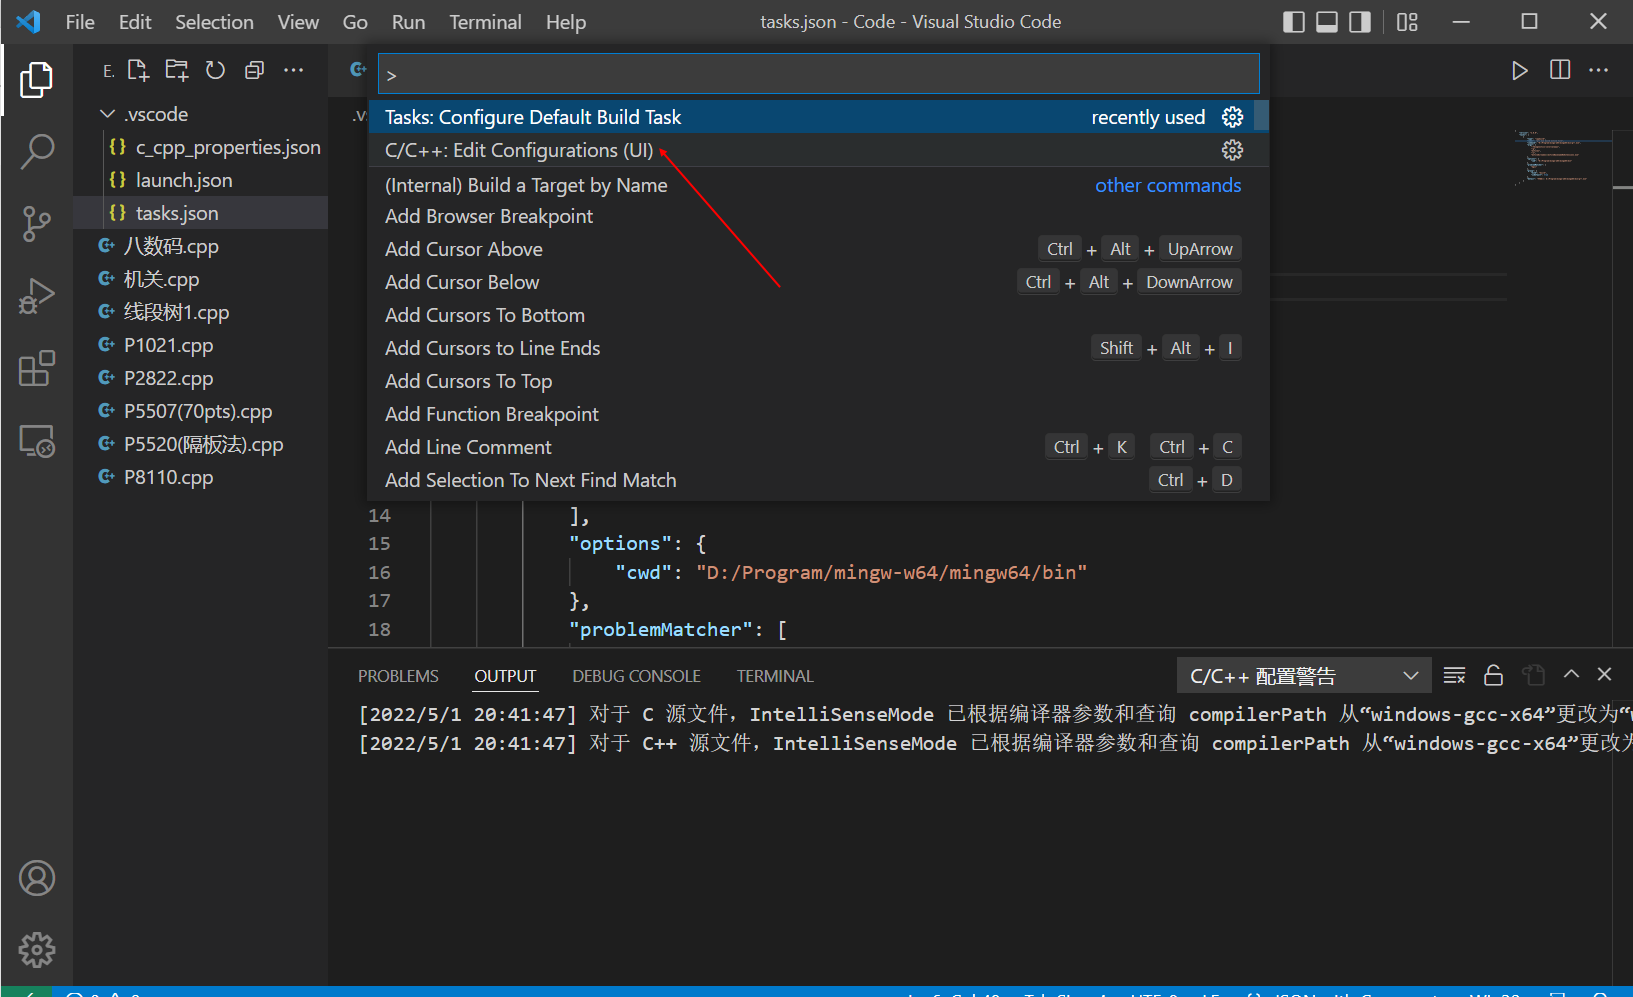
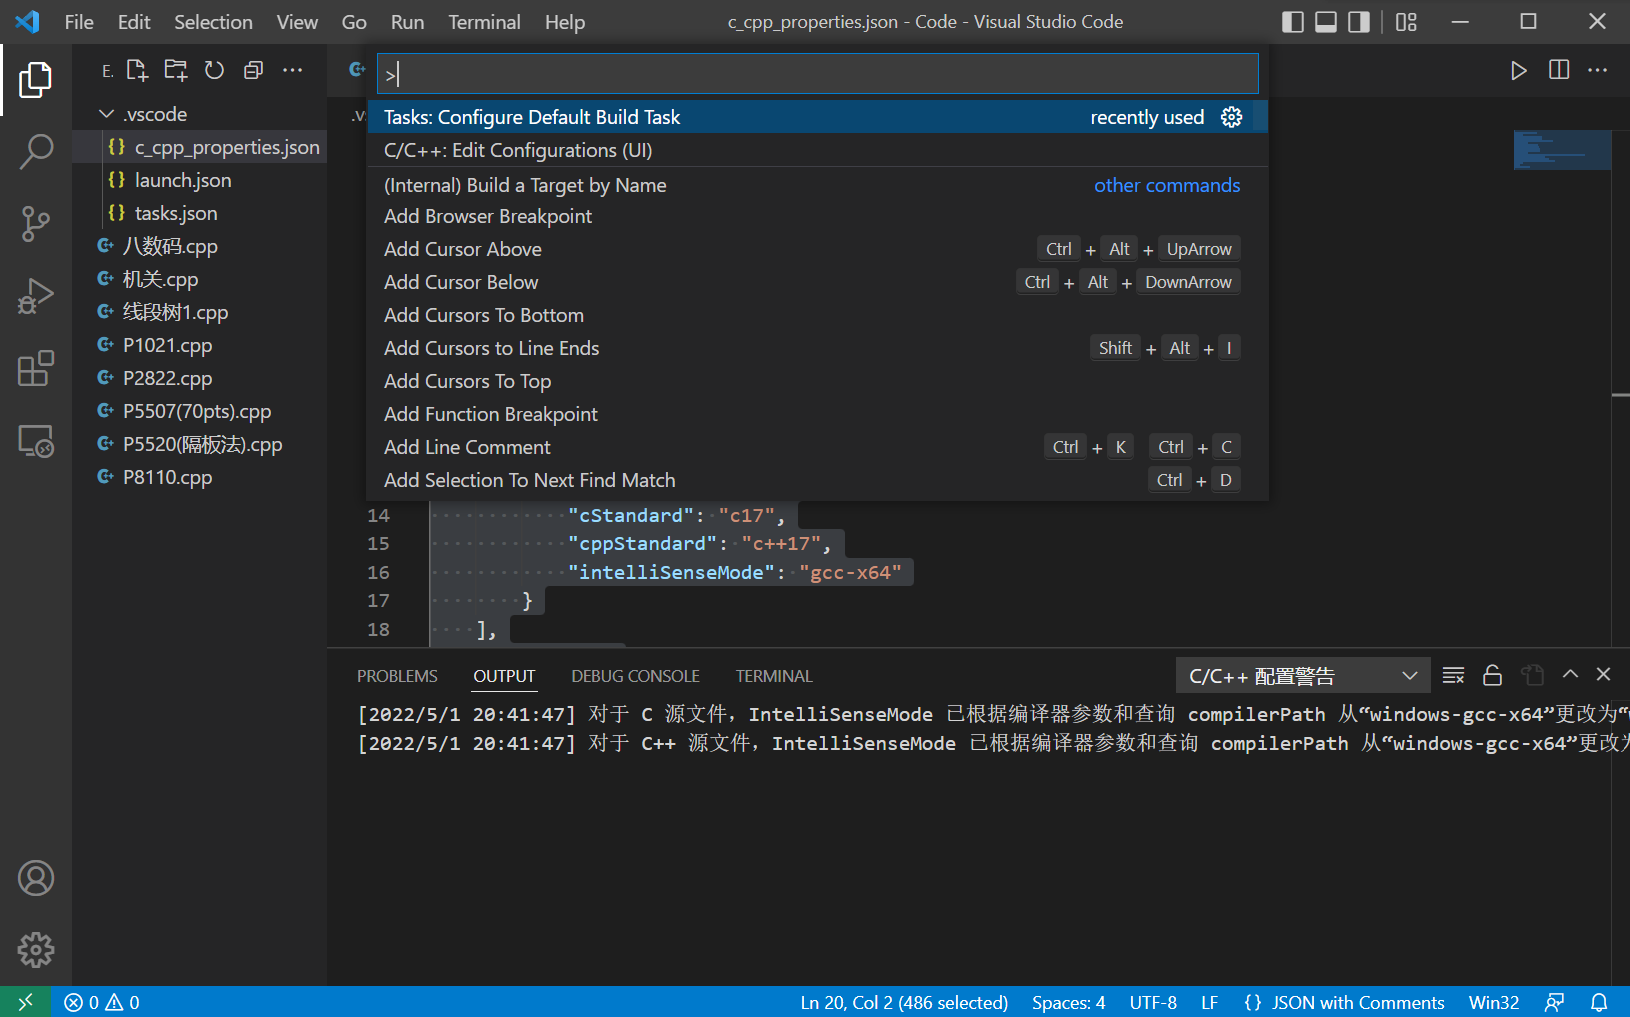
新建 Code 文件夹用来保存项目文件用Code打开 进入 VsCodeEdit Configurations(UI) 进入配置编译器路径 修改成 MinGW64路径,再将下方的 InteliSense模式 改为 gcc-x64 即可.vscode 的文件夹,证明配置成功
1
2
3
4
5
6
7
8
9
10
11
12
13
14
15
16
17
18
19
20
{ "configurations" : [ { "name" : "Win32" , "includePath" : [ "${workspaceFolder}/**" ], "defines" : [ "_DEBUG" , "UNICODE" , "_UNICODE" ], "compilerPath" : "D:/Program/mingw-w64/mingw64/bin/g++.exe" , "cStandard" : "c17" , "cppStandard" : "c++17" , "intelliSenseMode" : "gcc-x64" } ], "version" : 4 }
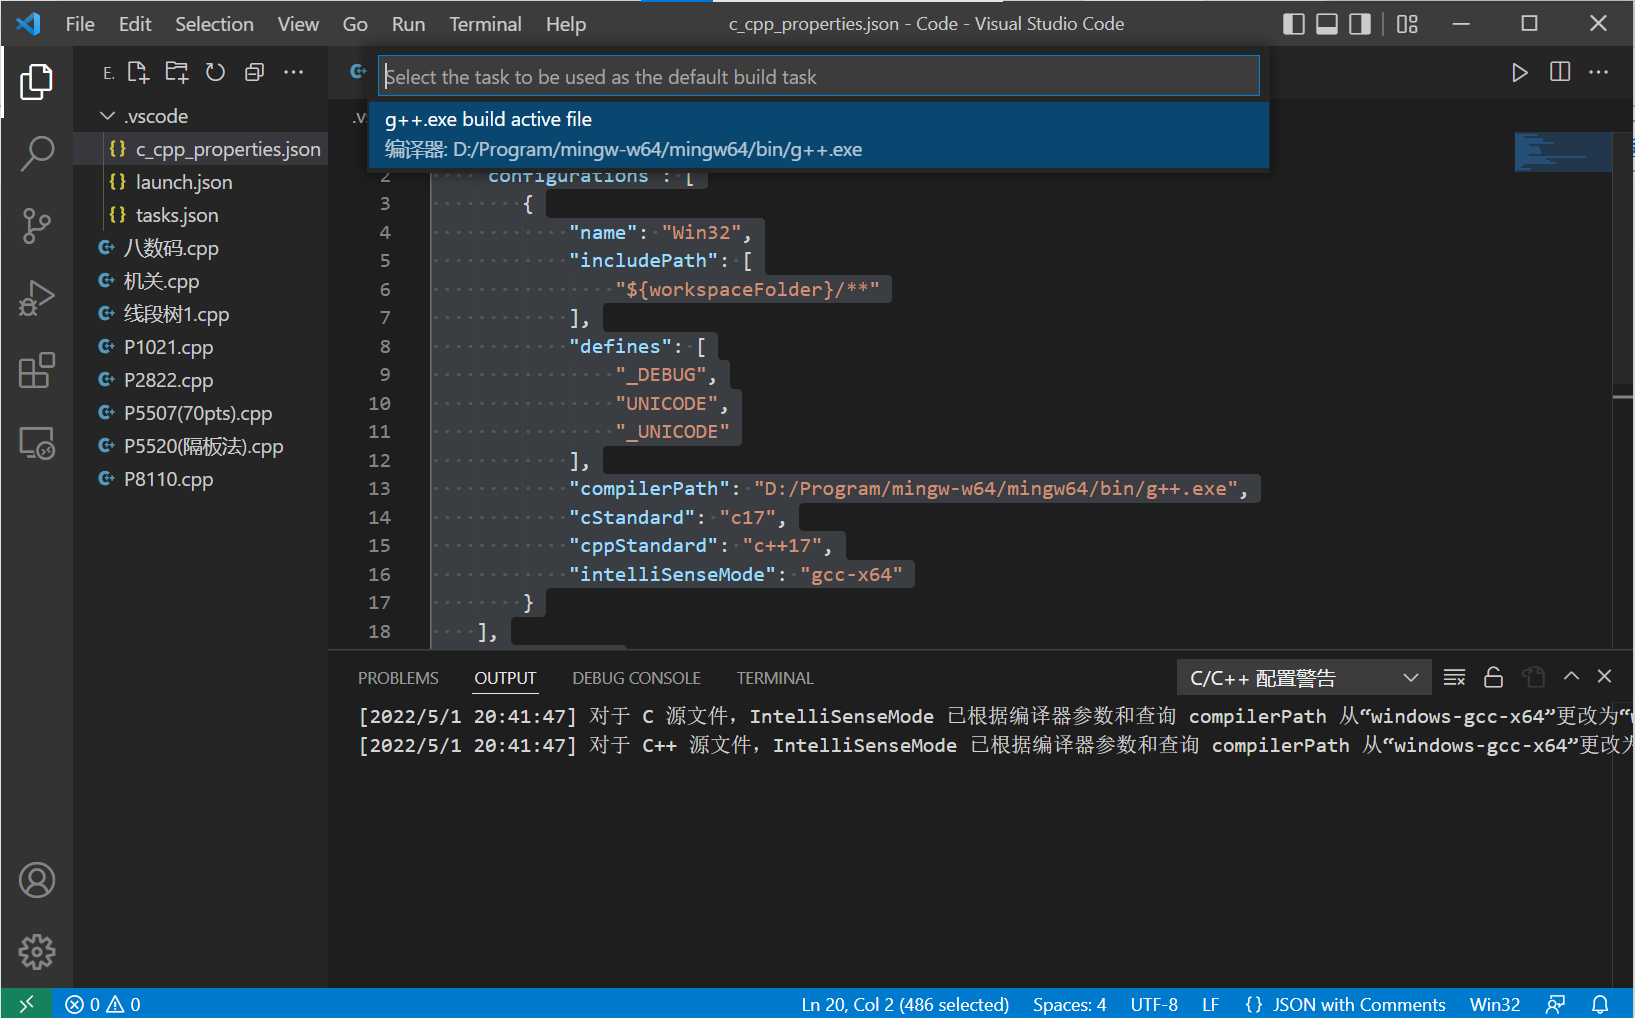
接下来,创建一个tasks.json文件来告诉VS Code如何构建(编译)程序编译器基于源代码创建可执行文件Tasks:Configure Default Build Task : g++.exe build active file**tasks.json 的配置文件
1
2
3
4
5
6
7
8
9
10
11
12
13
14
15
16
17
18
19
20
21
22
23
24
25
26
27
28
{ "version" : "2.0.0" , "tasks" : [ { "type" : "cppbuild" , "label" : "g++.exe build active file" , "command" : "D:/Program/mingw-w64/mingw64/bin/g++.exe" , "args" : [ "-fdiagnostics-color=always" , "-g" , "${file}" , "-o" , "${fileDirname}\\${fileBasenameNoExtension}.exe" ], "options" : { "cwd" : "D:/Program/mingw-w64/mingw64/bin" }, "problemMatcher" : [ "$gcc" ], "group" : { "kind" : "build" , "isDefault" : true }, "detail" : "编译器: D:/Program/mingw-w64/mingw64/bin/g++.exe" } ] }
点击菜单栏的 Debug–>Start Debugging 或者直接按键盘 F5 launch.json 的配置文件
1
2
3
4
5
6
7
8
9
10
11
12
13
14
15
16
17
18
19
20
21
22
23
24
25
26
27
28
29
30
{ "version" : "0.2.0" , "configurations" : [ { "name" : "(gdb) Launch" , "preLaunchTask" : "g++.exe build active file" , "type" : "cppdbg" , "request" : "launch" , "program" : "${fileDirname}\\${fileBasenameNoExtension}.exe" , "args" : [], "stopAtEntry" : false , "cwd" : "${workspaceFolder}" , "environment" : [], "externalConsole" : true , "MIMode" : "gdb" , "miDebuggerPath" : "D:\\Program\\mingw-w64\\mingw64\\bin\\gdb.exe" , "setupCommands" : [ { "description" : "Enable pretty-printing for gdb" , "text" : "-enable-pretty-printing" , "ignoreFailures" : true } ] } ] }
写一个 hello world! 的程序测试下环境配置是否成功system(“pause”) 的代码,不然程序会闪一下就消失了